
Mixing is often mistaken for being a purely technical skill.
Aside from understanding and implementing audio software tools, it’s important to remember that all the decisions made by the producer are being led by creativity.
A brief definition of Audio Mixing would be: “the process of applying volume levels, FX processing, panning and routing to channels in relation to the overall sound of the composition”.
This is something a Music Producer does constantly!
Once an adequate level of knowledge is reached and the power of FX is unlocked, you will also learn that FX can completely transform sounds into entirely new creatures.
For example: A bass sound can become a pad with a Lowcut EQ and loads of Reverb.
Now that we have defined just how broad and powerful mixing can be as a creative tool, let’s explore 7 creative ways you can improve your mix in the specific context of Drum & Bass.
Contents
- Create Separation/Placement Using Equalisation
- Create Separation/Placement Using The Stereo Field
- Improve Vocal Clarity Using Dynamic FX Processing
- Use Saturation & EQ To Add Power To Vintage/Classic Breaks
- Perfect How The Kick And Bass Interact
- Introduce Excitement And Detail Using Foley
- Use A Variety Of Reference Tracks From Multiple Genres
1. Create Separation/Placement Using Equalisation
Each sound in your mix will sit within a certain range in the frequency spectrum.
It’s useful to always remember and consider this when mixing.
If there are two sounds that cross over or occupy the same area in the frequency spectrum, it is not always a bad thing.
Their interaction can even be beneficial.
However problems can begin to arise once two prominent sounds at the forefront of the mix begin to jostle for the same spot in the frequency spectrum.
This could be the lead vocal and a synth hook for example.
Or commonly in Drum & Bass: elements of Drums (such as Hi Hats) clashing with Resonant Tones/High Frequencies in Bass/Synth/Vocal parts.
An adjustment using EQ can effectively separate the sounds and solve this problem.
Alternatively you can look to making an adjustment in the Stereo Field to separate the two sounds.
To help identify frequency clashing you can use a frequency analyser or an EQ with a visual display on all of your channels as you go. Try to keep an eye out for when two parts are sitting in the same band, then review how they are interacting and take steps to solve the problem from there.
“When placing sounds you can place them somewhere in the Stereo Field and you can place them somewhere in the Frequency Spectrum.”
Nik from Noisia
A nice takeaway from the video is the technique of creating a ‘hole’ in the frequency signature of a sound to open space for other sounds in the mix – just remember to avoid cutting out the fundamental or too much of the resonant harmonics.
2. Create Separation/Placement Using The Stereo Field
One of the key ways to separate sounds that are clashing is by using the Stereo Field.
Applying panning or widening FX such as Sample Delay, Stereo Delay or Reverb will effectively separate two sounds and help eliminate clashing.
Do not rely too heavily on this technique though, as it can negatively effect how well your mix translates to mono if you place too much in the stereo field.
Imaging plugins can indicate the activity of stereo field in your mix.

3. Improve Vocal Clarity Using Dynamic FX Processing
Applying a DeEsser to eliminate problematic sibilance will help to clean up a vocal and make it sound smoother and clearer.
Applying compression will help to stabilise a vocals volume level and keep it consistent and loud at a level the listener expects.
There is always space for creativity in the mixing process and Dynamics processing is no exception.
Try out the following creative mixing techniques next chance you get:
1: Consider adopting Sidechain Compression to create some movement between the vocal and the Drums – sidechaining the vocal to the kick is a popular technique and can even be a pleasing and unique effect with extreme settings.
2: Heavy compression settings applied via a send can introduce some pleasurable distortion effects when overdriven – if the heavier distorted vocal is not what you are going for, this technique can also help to give presence and power to a Vocal with lighter settings. Read more on Parallel Compression.
3: Placing reverb on a send will allow you to sidechain the wet signal to the vocal signal itself, reducing the reverb volume when the vocal is playing – this can help clear up a vocals clarity and keep it powerful and centred.

4. Use Saturation & EQ To Add Power To Vintage/Classic Breaks
The Classic Breaks are a mainstay in Drum & Bass production.
When working with them its important to remember the following:
Many of the Classic Breaks were recorded a long time ago using Vintage Analogue Equipment that attenuates higher frequencies.
It’s easy to see this high frequency attenuation on a frequency analyser plugin – it will be clear that the high end has been reduced as a result of the vintage recording equipment.
Each situation will be unique and you will have to evaluate what FX may be able to improve the sound of the break, consider applying either:
- A High Shelf EQ boost.
- Saturation to introduce new harmonics and help to fill out more of the frequency spectrum.
Sometimes that vintage classic raw sound is desirable so you might want to leave them alone.
However, if you are looking for a cleaner and more powerful modern sound whilst still using a classic break, the two tips can go a long way in improving their strength.

5. Perfect How The Kick And Bass Interact
When mixing Dance Music, the low frequencies are very important to get right.
First you need to ensure that everything below ~ 100Hz is in mono.
In the context of Drum & Bass: The bass plays a pivotal central role in a track and mixing decisions made regarding it can truly make or break a tracks vibe.
The Kickdrum will likely sit in the same area as your Bass sounds.
As we mentioned before, frequency clashing is a problem.
Having the two of them playing at once will likely introduce phasing issues.
These are better off avoided.
There are two key approaches to perfecting the Kick and Bass interaction:
- Sidechain your Sub Bass to the Kick
The idea here is that when the Kick plays, the volume of the Bass is muted/reduced drastically so that they don’t ever play together or introduce Phasing. When applied correctly it shouldn’t even be noticable to the listener. - Make sure the Kick sits outside of the Sub Bass Frequencies
You might make the creative decision of using a light Kick that naturally sits outside of the Sub Bass frequencies in your track and so naturally avoids Phasing. This is a technique Drum & Bass producers might use when working with a powerful Reese Bass for example which sounds great just left to dominate the lower frequencies on its own.
Whilst we are on the topic of Kicks and Bass, there is a question that comes up regularly:
Do I need to tune my kick to be the same key as my bass?
The easy answer is no.
Like anything we will be discussing here, this is a creative decision that needs to be made based on your own personal preference depending on how it sounds in each scenario.
There is just one thing you need to remember:
If a kick is in the same key as a bassline, they are less likely to have really dramatic phasing problems…
But! Phasing will almost always still occur, so its good practice to dedicate your sub to being in either the kick or the bass, and not to have both playing at once.
Also bare in mind that as most kicks do not feature a consistent tuning in their tone, so their phasing pattern can be unpredictable.
Many pleasing thuddy kicks feature a ‘deep’ pitch which means it’s pitch is constantly falling – these are still considered to be in the tune of the frequency that is sustained longest in the body of the kick, but when it sits alongside a solid sub, its not going to be predictable with how it phases with the sub.
Lets take a closer look at this:
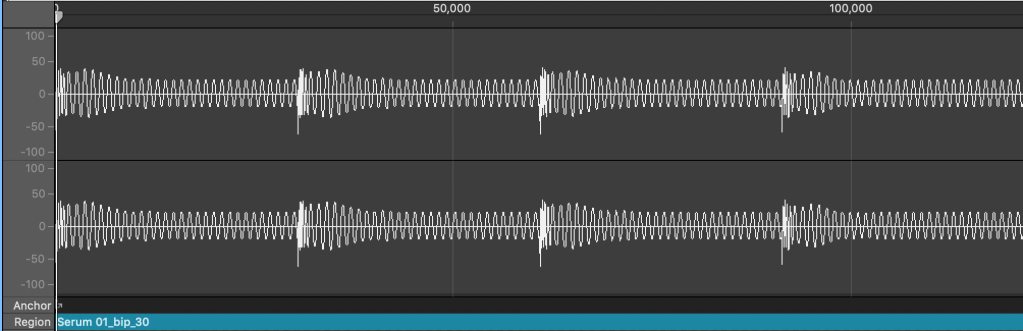
Sub in F playing along side a Kick in F.

Two important observations:
- The volume of the sub has been increased dramatically.
- The sub level is really high when it is first combined with the kick, then each time they combine again the resultant sub gets quieter.
The second point has happened because there is a sustained bass note in F playing across the entire 4 kicks.
Now unless the sub note aligns perfectly with the tempo of the kicks playing, i.e it is reset and starting off from the zero crossing line in the same direction each time the kick plays, the kick will be playing at different locations along the subs waveform each time, resulting in a different level of sub loudness every time.
So this is also a complication to consider when allowing subs from a kick and bass to combine when in key.
The phasing between the kick and bass can be made more predictable if the sub bass is triggered to play each time a kick is played.
In the example above, if we changed the sub bass to play each time the kick played, we would get 4 identical kicks that look like the first one in the image.
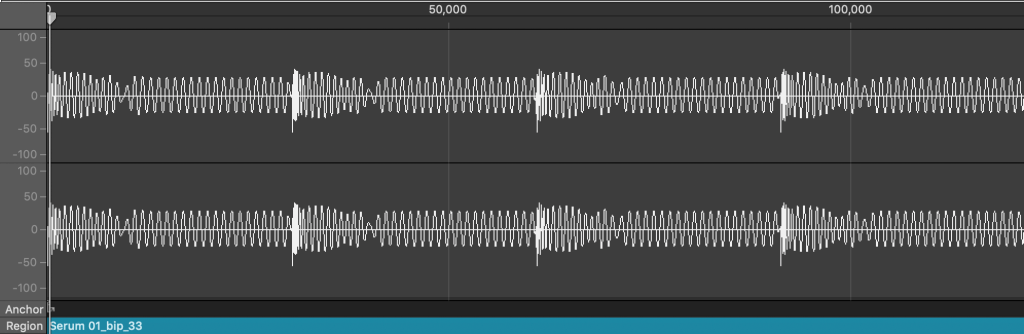
Lets have a look at what happens when a kick is played in a different key to the sub bass:
Sub in F playing along side a Kick in A.

It’s plain to see the destruction that this causes to the low end and its quite clear to the listener that there is a problem occurring.
In each case the result is not desirable, as in the previous example we saw that even when there is no serious phasing issues happening, we get a much louder resultant sub.
Now it doesn’t really make sense to allow either situation to happen when we can be smart and use volume automation (or dynamic FX such as sidechain compression) to remove any interaction between the kick and the sub.
Now lets see what this might look like…
Sub in F sidechained to a Kick in F.
Now it’s looking far more controlled and audibly its much more pleasing than either of the previous examples.
If we have this signal coming through a big sound system, its going to be much more consistent and powerful.
As a result, it will be much better at interacting with the rest of your Drum & Bass mix, like having a foundation of solid steel to build a skyscraper on.
Using a sidechain compressor is one option for achieving this, but it can be really hard to get perfect.
So we recommend using a plugin like the volume shaper in Shaperbox 2 by Cable Guys which allows you to carefully design volume like a sidechain compressor would – only you have more control and you can draw in what you want the volume to do, like with volume automation.

To round this off, lets look at how the Kick in A works with the F Sub when volume controls are used:
Sub in F sidechained to a Kick in A.
This is definately a key area of your Drum & Bass mix to get right, if left unchecked it can drastically reduce the quality of your track.
So pay close attention to those two guys: The Kickdrum and your Sub.
Remember that they don’t get along, so you need to consider cutting one out when the other is playing.
6. Introduce Excitement And Detail Using Foley
Electronically produced music can begin to sound synthetic and devoid of the intricacies and complexity of sound found in the real world.
In a club environment, the listener is not going to be as tuned in to the finer details of your composition.
However, in the home listening environment the details matter much more.
Layering Foley and Textures into your track is a powerful technique for adding detail and your own unique signature to your work.
It can help add more presence across areas of the frequency spectrum that are lacking in your mix.
It can also transform and bring static dead sounding Drums to life!
Discover 5 Creative Ways To Use Foley and Textures In Music Production.

7. Use A Variety Of Reference Tracks From Multiple Genres
Using a reference track is essential during the mix down process.
Without one, you are far more prone to going down strange rabbit holes and wondering off with the levels and placements of instruments.
This can ruin a mix!
Many Producers use a track from the genre they are creating and immersed in as their reference.
This is great and its what you should do.
Our tip here is to expand on this: consider looking towards other dance music genres and use multiple reference tracks during your mixdowns.
When selecting reference tracks its important to consider the following:
What are the lead characteristics of your track and what do you want in the centre stage?
From this you will be able to categorise the track as being Vocal-Led for example.
So in this case, select a reference track that is also Vocal-Led.
Below is a useful table that displays some genres you should consider using as a reference track for different track types.
| Track Type | Suitable Alternative Genres To Reference |
|---|---|
| Vocal-Led | Pop, House, Hip Hop, Grime |
| Bass-Led Instrumental | Dubstep, Techno, Trap |
| Percussion-Led | Tribal House, Garage |
This Article is brought to you by KAN Samples.
Pro Audio Tools for Producers.
Subscribe For Free Samples
You Will Get:
✅ 100% Royalty Free Samples For Music Production.
✅ A Free Demo Pack of our latest Product.
✅ Free Demo Packs of all Future Products.
✅ Unsubscribe any time.
✅ No junk mail.

0 comments on “7 Creative Mixing Techniques To Help Improve Your Drum And Bass Mix”