
In order for some of our preset products to work, you may need to have the latest version of Serum installed. Here is how you can update your plugin to the latest version quickly and easily.
How To Check What Version of Serum You Have
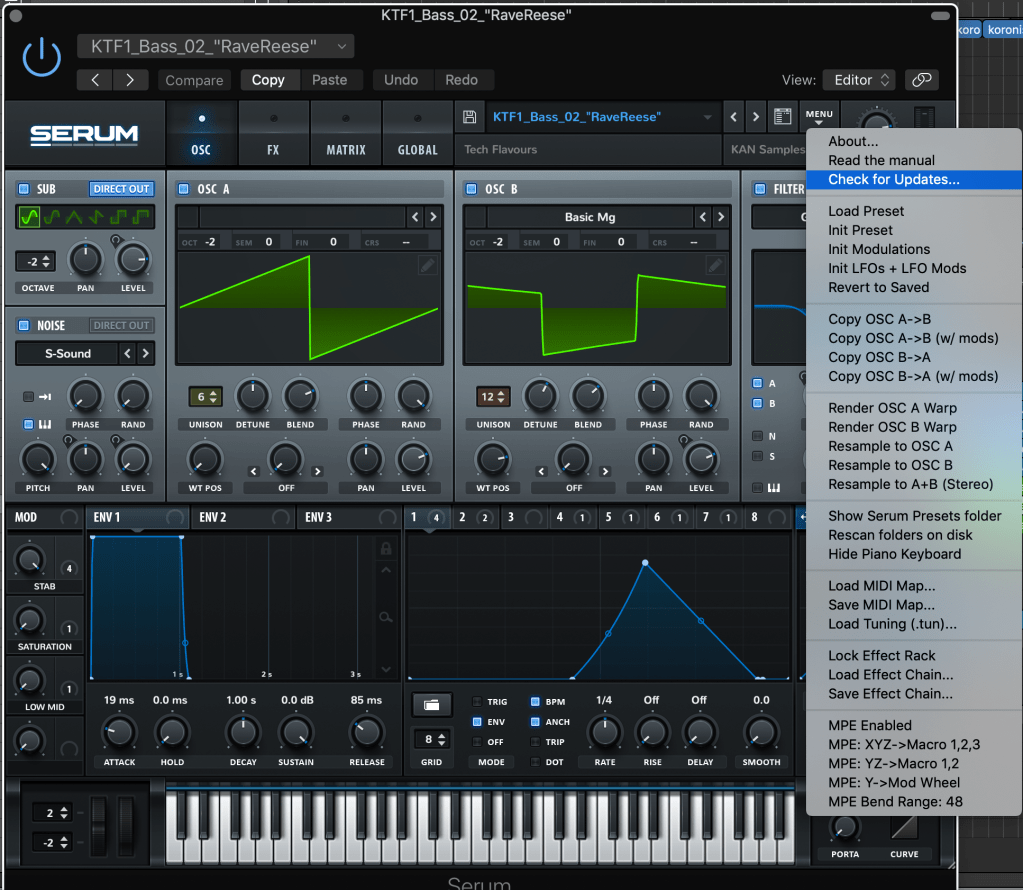
To check what version of Serum you currently have, open the Plugin in your DAW and under ‘Menu’ select ‘About…’
You should then see information on your Plugin appear, the current Version of the Plugin is displayed on the second line at the top.

How To Update Serum If you purchased the plugin from the Xfer website
- Head to the Xfer Records Website.
You can also open the Plugin in your DAW and navigate to ‘Menu > Check for Updates… > Website”. - Sign in to your account at the Xfer Records Website.
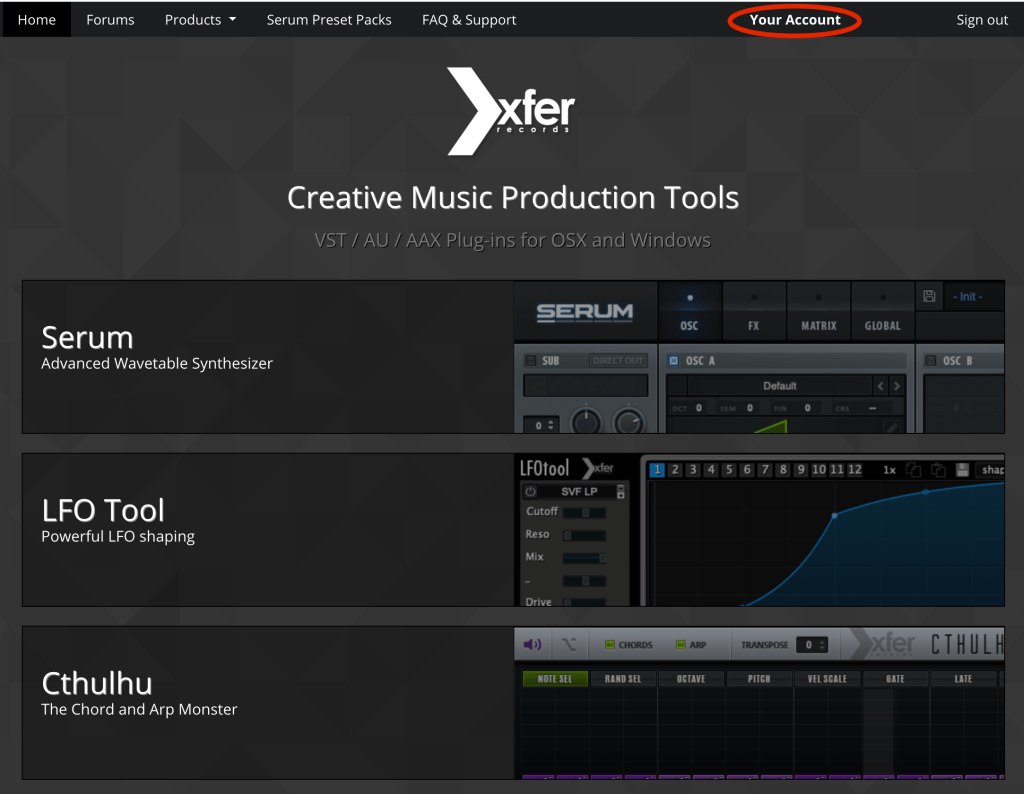
- Select ‘Your Account’ in the top right.
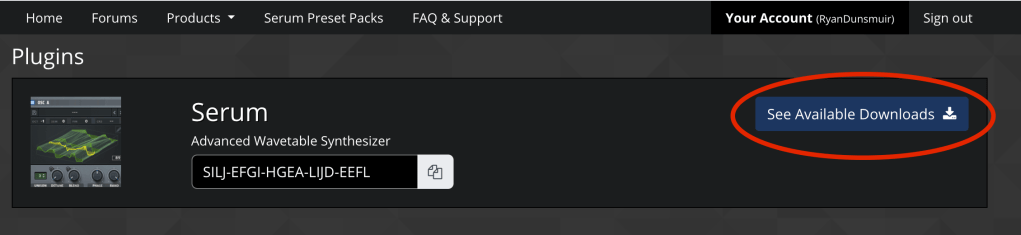
4. Under ‘plugins’, head to Serum and select the button ‘see available downloads’.
5. Navigate to ‘Update’ and select the appropriate ‘Download’ button depending on the operating system you are running.
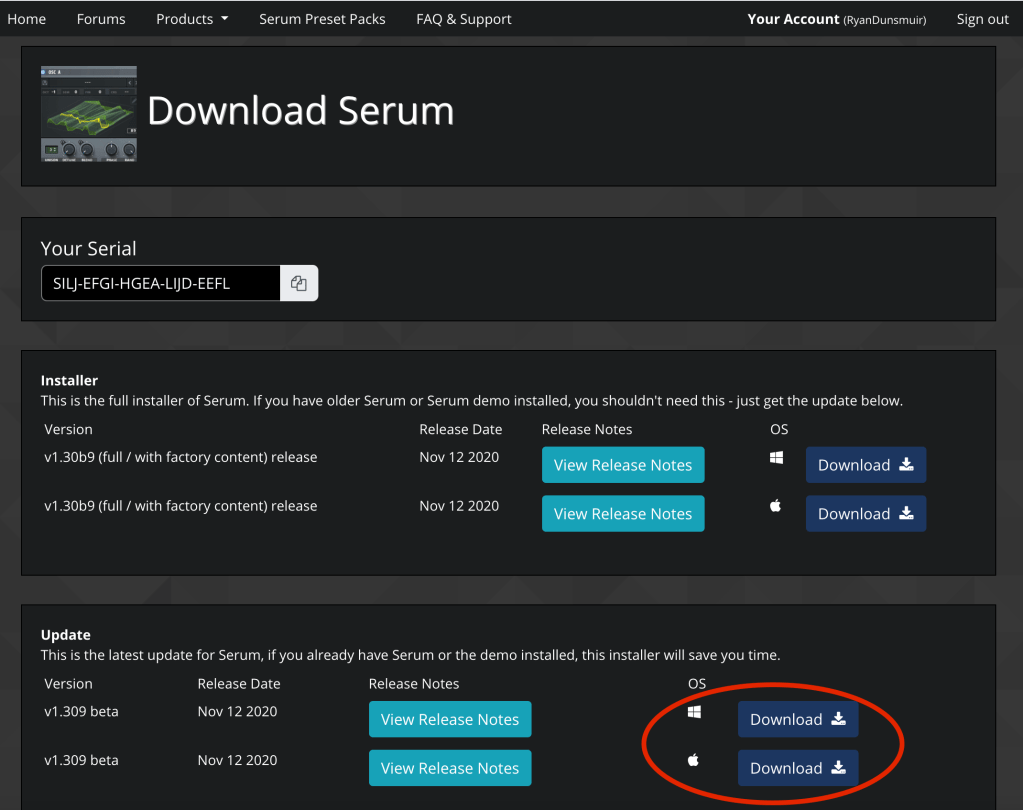
6. Run the installer once the download is complete and your plugin should then be updated.
Common issues or problems
- If you still see the older version of the plugin in your DAW you may need to relaunch it in order for it to display the latest version.
- A common issue that makes Serum not update is when the VST installation is in a different location than your DAW is looking for the plugin.
To fix this you will need to go into your DAWs settings and look for where the VST folder is set:
In FL Studio: this is in the plugin manager (Options > Plugin Manager).
In Ableton: Preferences->File/Folder->”VST Custom Folder”.
In Logic Pro: The plugins folder is by default: “Macintosh HD > Library > Audio > Plugins > Components”. To see more settings, in Logic Pro X head to “Logic Pro X > Preferences > Plugin Manager…”.
In other VSTs: the setting is located under the preferences.
How To Reinstall Serum
If you attempted to update your plugin following the steps above, but the update did not install correctly, it is recommended that you re-install your plugin. To completely wipe the plugin and install it again:
- Delete the plugin file (Serum.dll / Serum_x64.dll) from any and all folders your DAW looks to for plugins.
- Rescan/refresh your DAW or restart it and verify that Serum is no longer available.
3. Head to the Xfer Records Website, Sign in and click on ‘Your Account’.

4. On the account page, under Plugins > Serum select “See Available Downloads”

6. Under Installer, select the appropriate “Download” button for your operating system.
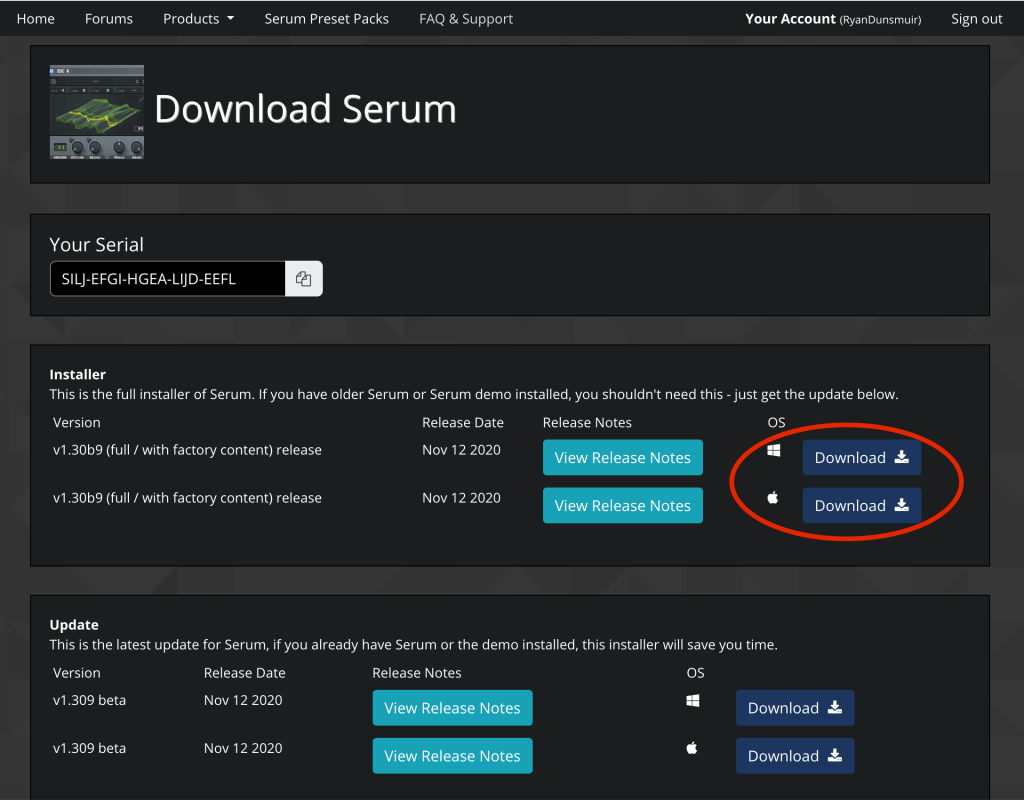
6. Run the installer and install the Plugin to the location where the plugin file(s) used to be.
How To Update Serum If you rent-to-own the plugin on Splice
- Open the Splice application and Navigate to ‘Tools’.
- Beside Serum there should be an ‘Update’ button where the ‘Install’ button was when you first got the plugin.
Common issues or problems
If you own the plugin on the rent-to-own method and your payments have been paused and it is no longer “active”, it won’t let you update Serum until you resume the payments.

This Article is brought to you by KAN Samples.
Pro Audio Tools for Producers.
Subscribe For Free Samples
You Will Get:
✅ 100% Royalty Free Samples For Music Production.
✅ A Free Demo Pack of our latest Product.
✅ Free Demo Packs of all Future Products.
✅ Unsubscribe any time.
✅ No junk mail.

0 comments on “How To Update To The Latest Version Of Serum”