
In this article we share a tip on improving your workflow as a Music Producer using Logic Pro.
It involves creating Project Templates tailored to how you prefer to work.
Though quite time consuming, setting up custom Project Templates will save you loads of time in the future, give you a solid outline of your songs structure the moment you open a blank project and even shortcut repetitively routing and bussing your channels.
To do this, you will need to create a new empty project in your DAW and follow the numbered steps outlined below – but first lets quickly go over how to create Project Templates.
How to create Project Templates in Logic Pro X
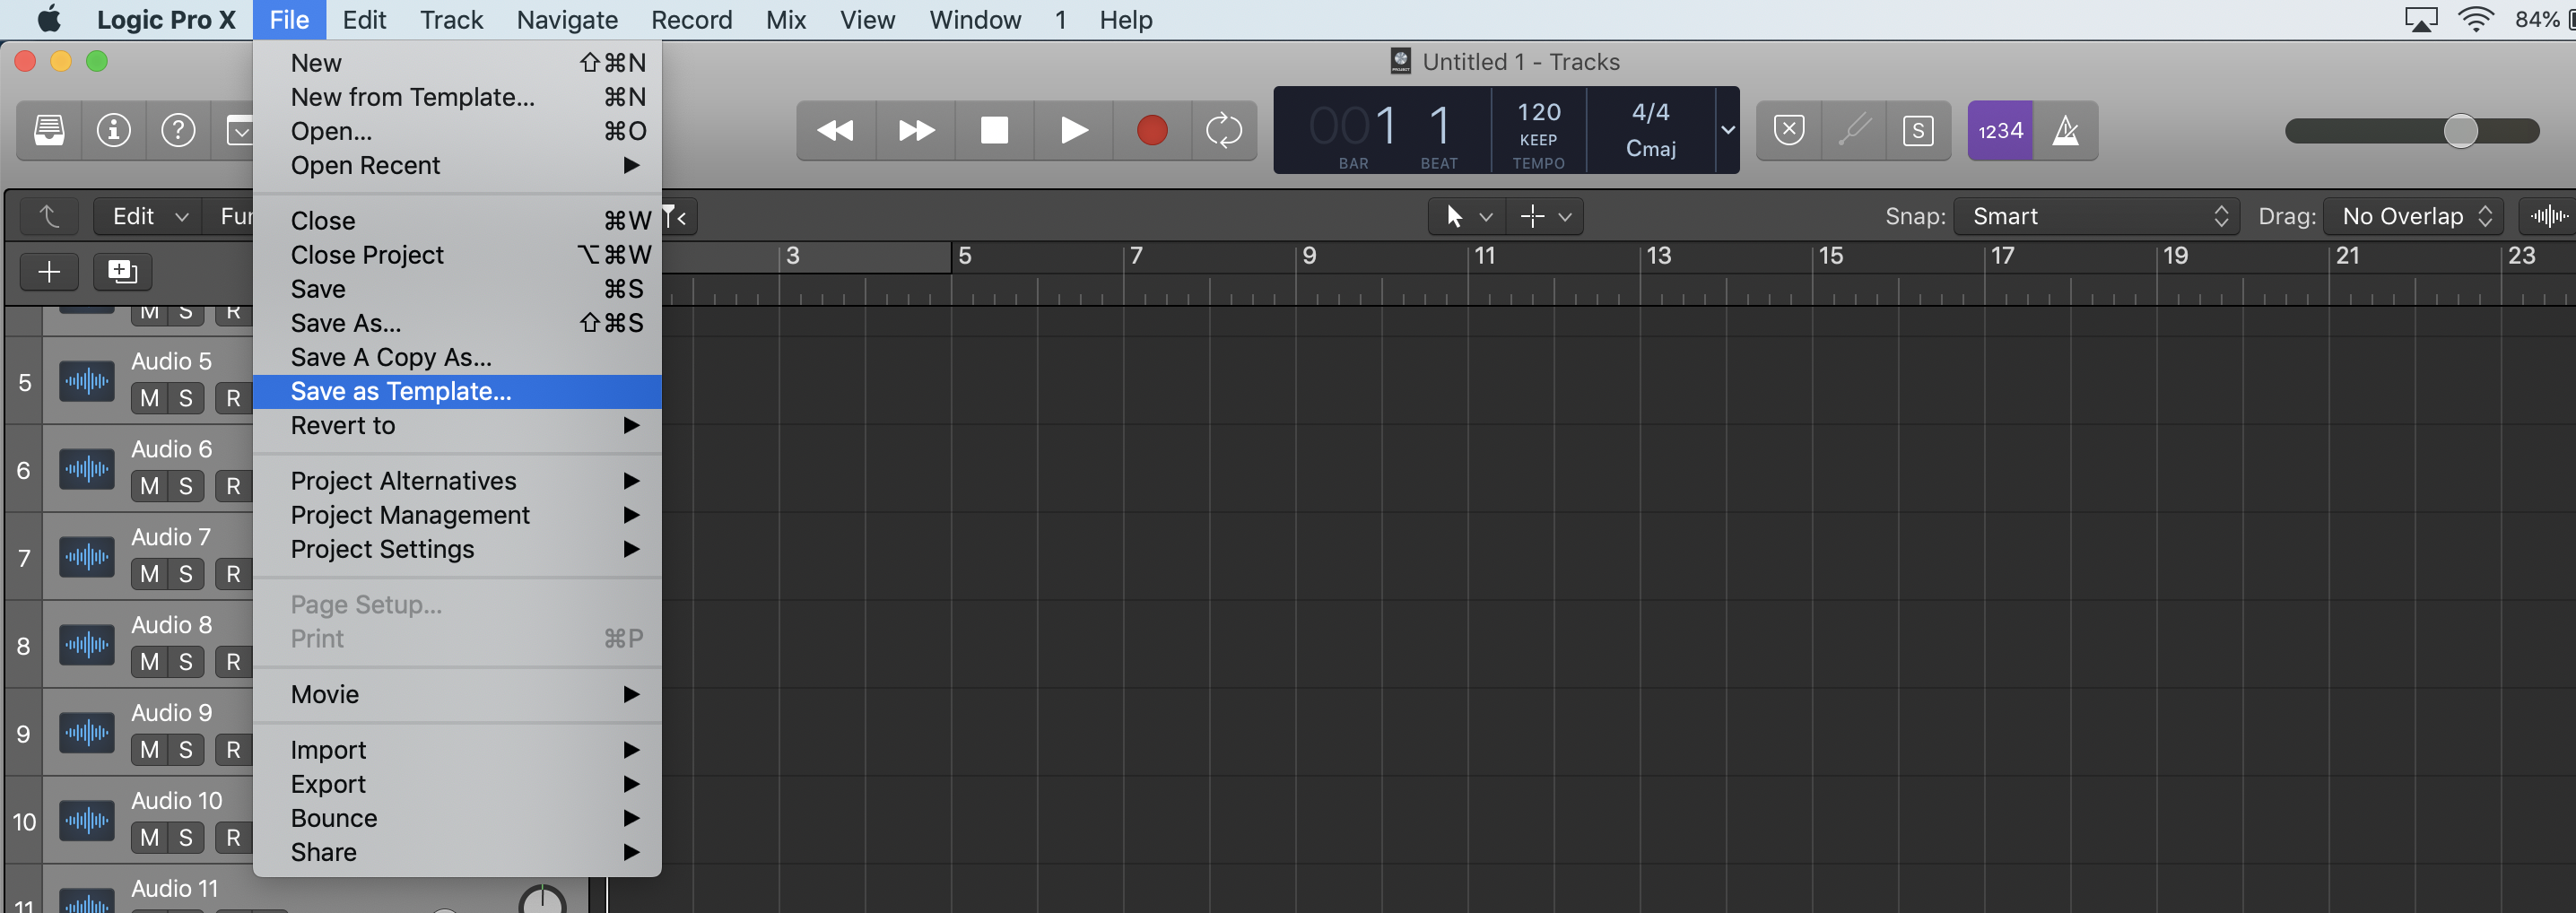
To save a new project as a Project Template, simply select: File > Save as Template.
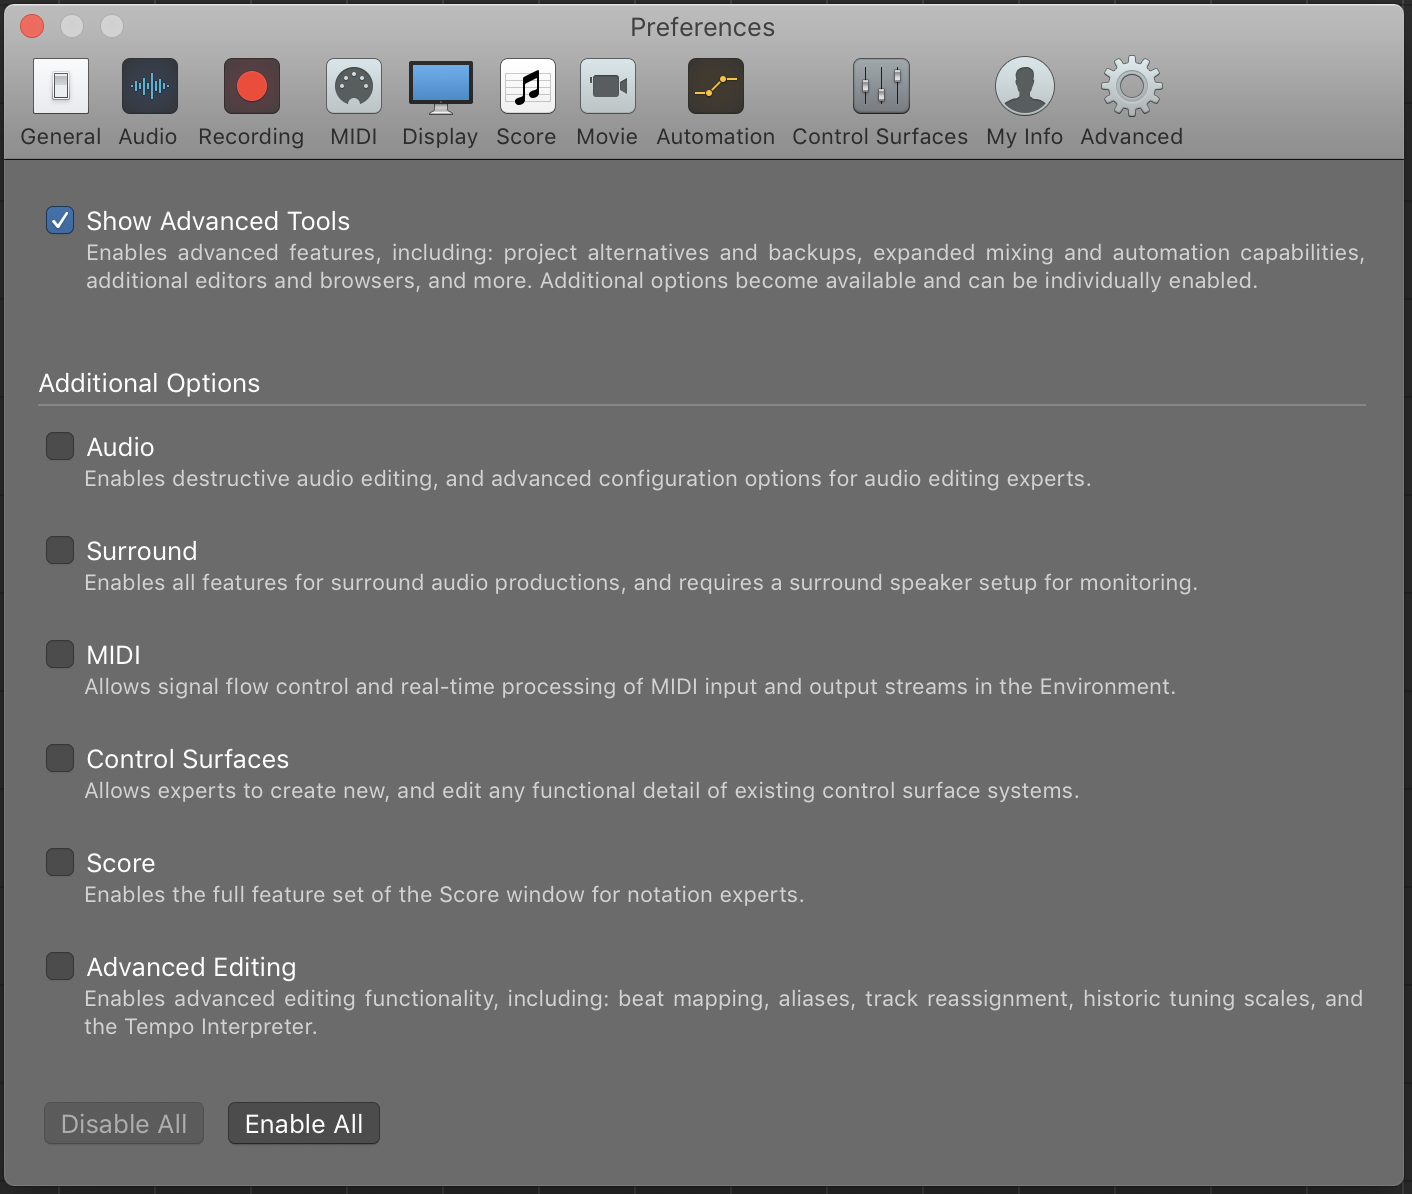
You may not see this option if Advanced Tools are not enabled in your preferences.
To enable advanced tools, navigate to: Logic Pro X > Preferences > Advanced > Show Advanced Tools.
Now you know how to create a Project Template, let’s get started on how to make a good one.
1. Use Markers To Outline Structure
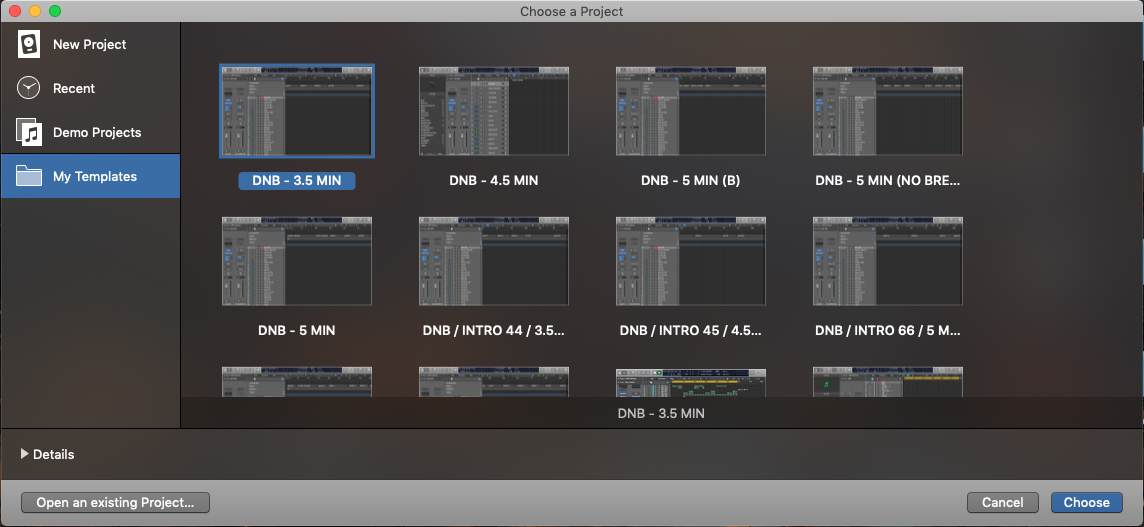
Use markers to outline the songs structure appropriate to the genre – you can vary the layout and save the different variations with appropriate names referring to the different track lengths and features.
For example, a template could have a short intro and a long breakdown, or it could be a 7 minute long opera or a short 3 minute tune.


2. Create Blank Channels
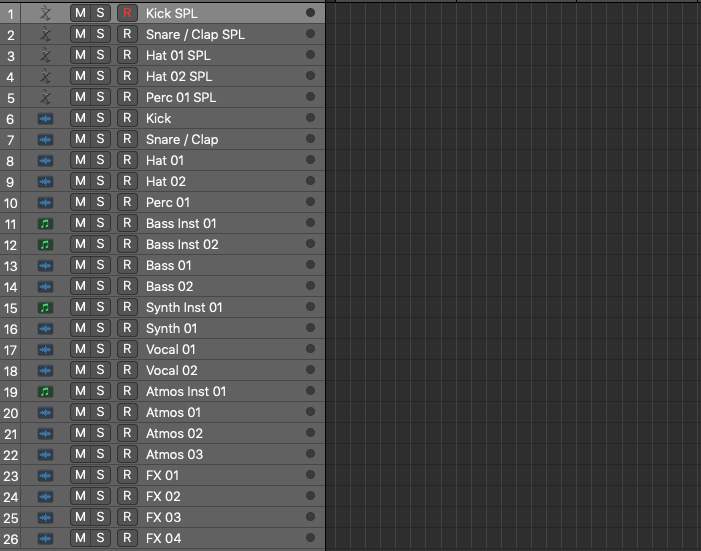
Create a single channel for each possible component of the track (just include one for each as this channel can then be duplicated).
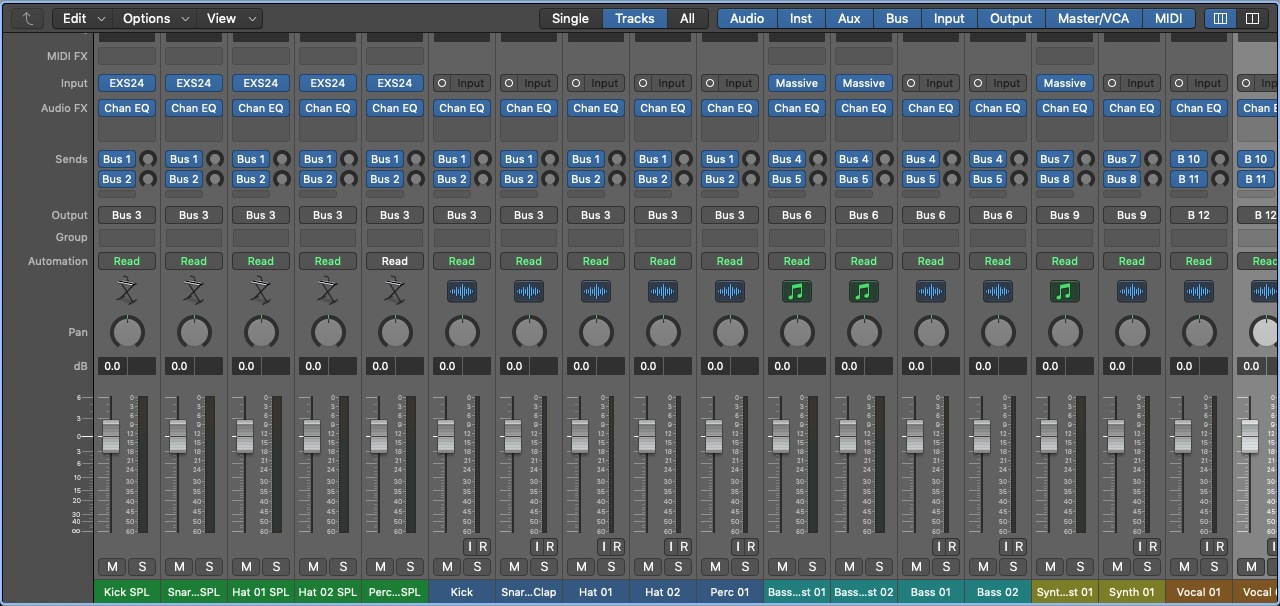
Be sure to put all channels belonging to each group together (so all of the drum channels are on channels 1-10, followed by bass channels 11-14 and so on).
An example is given in the picture below – be sure to include Sampler Instrument tracks in addition to Audio Tracks, or just include these if they are all that you use – tailor it to your style.
3. Setup Routing and FX Sends
Set up the routing and bussing of the channels to allow for easy manipulation of groups and FX sends.
This allows you to control and manipulate groups of your song easily as you work on getting your ideas down.
For example, adding a high-pass filter sweep to your drums in a buildup.
Approach this in your own way or follow this outline:
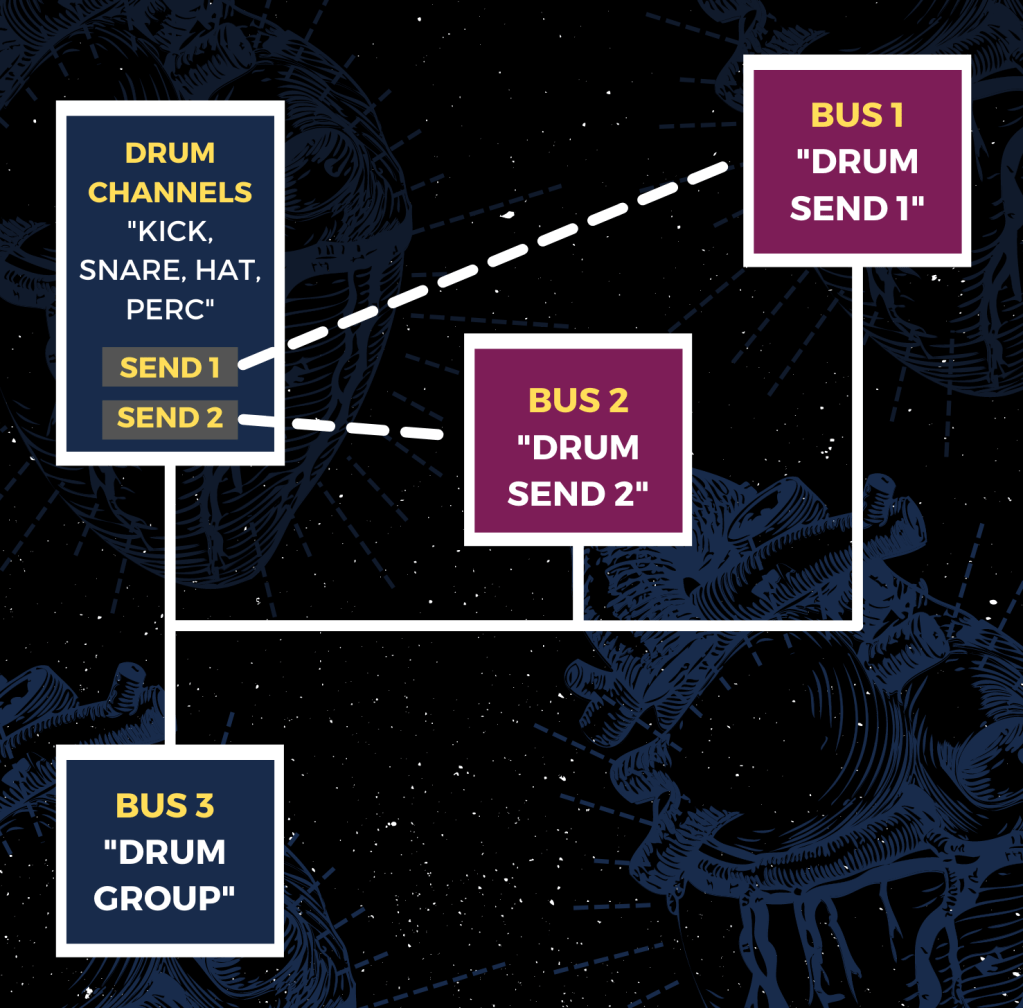
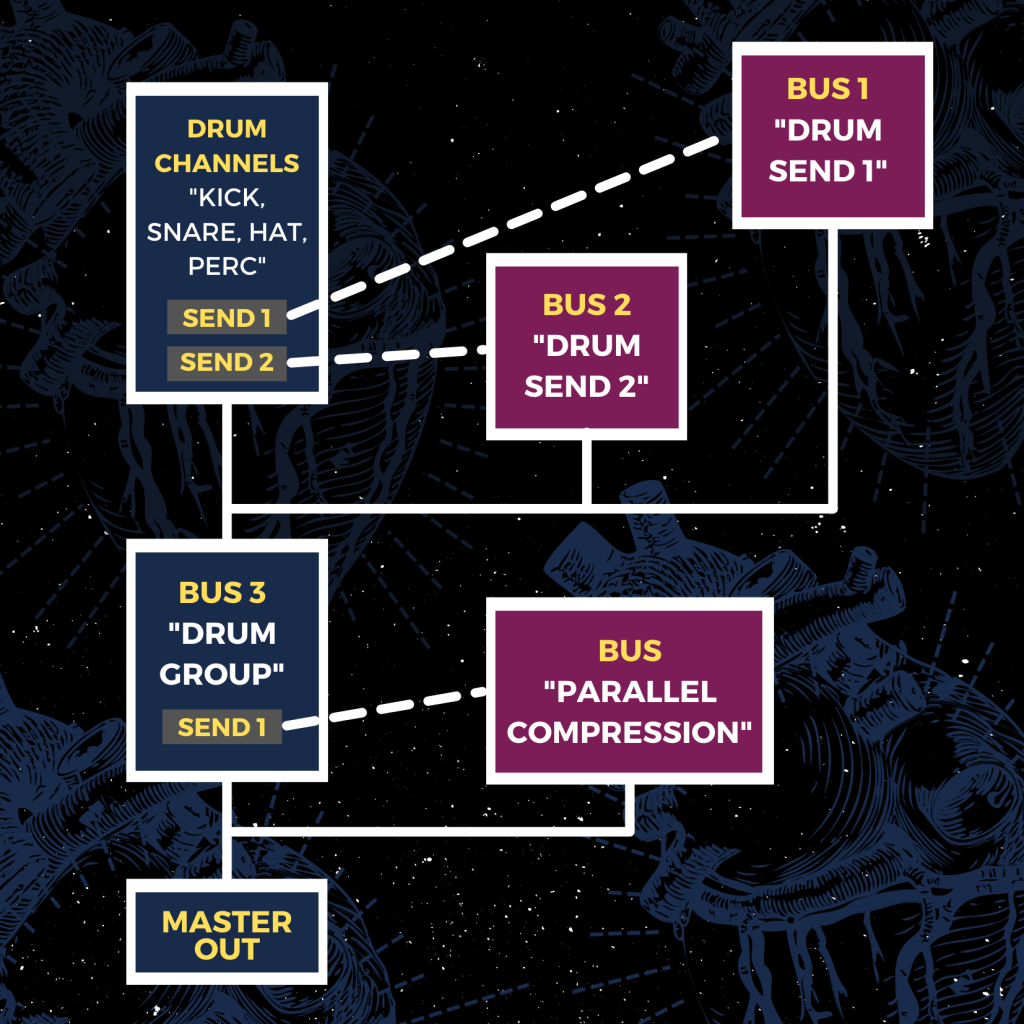
- Set the 1st and 2nd sends of all Channels from the first group (such as the Drums) to Bus 1 (name this ‘Drum Send 01’) and Bus 2 (‘Drum Send 02’).
- Set the output of these channels and those two sends (Bus 1 and Bus 2) to Bus 3 (‘Drum Group’).
- Repeat this for each group, each time using 3 new busses for each group.For example: Drum Channels send to Bus 1 and Bus 2 and output to Bus 3 (Bus 1 and Bus 2 output to Bus 3 too), Bass Channels send to Bus 4 and Bus 5 and output to Bus 6 (Bus 4 and Bus 5 output to Bus 6 too) and so on.
See below a visual aid to help show the routing and an example of how the mixer should look.
Setting up the routing and sends this way allows you to easily add effects such as a reverb room to your drum group by adding a reverb plugin to one of the drum sends.
It also gives easy control over group levels allowing for a more versatile mix down.
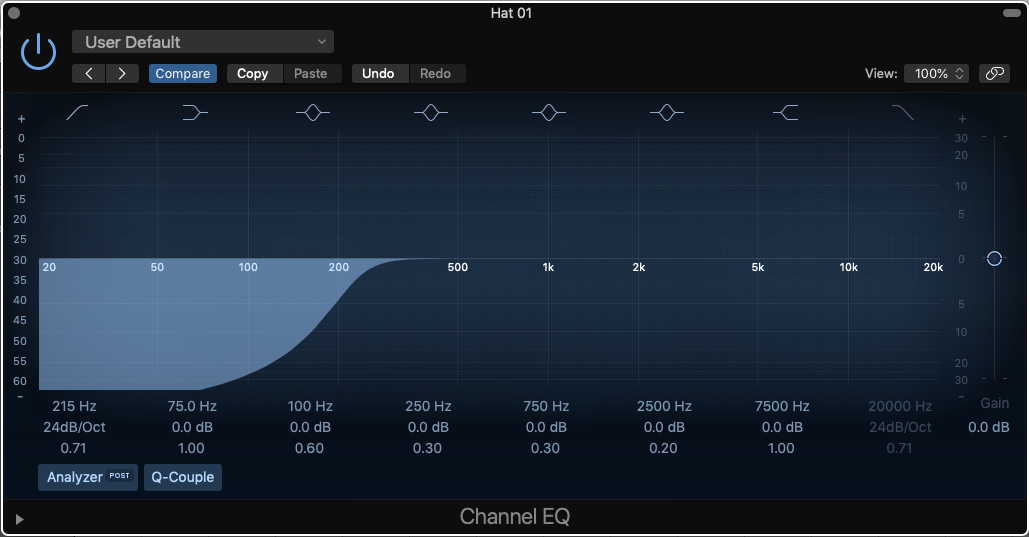
4. Add appropriate EQ to each Channel
You will most likely use EQ on many of your channels, so having them there already saves time.
Consider adding appropriate EQ cuts on channels that would need it – such as a lowcut on the hat channel to remove unwanted low frequencies (pictured below).
5. Set Up Parallel Drum Compression if you use it
Parallel compression is a very popular technique used in mixing to add volume and power to drums without severely crushing the dynamics by mixing the dry signal with a compressed version.
It can be set up by adding a send to the “Drum Group” Bus (shown in the examples as Bus 3) to a new Bus Channel – you can name this “Parallel Compression”.
On this new Bus Channel add a compressor with heavy compression settings, and then the “Drum Group” aux send to this channel can be adjusted to dial in Parallel Compression to the desired level.
Please note that many modern compression plugins include a Wet/Dry mix and if you own one, then you can simply add this to the “Drum Group” channel and use this mix control to apply parallel compression – there is no need to do this additional routing.
6. Customise and make it your own
We all develop unique ways of working and laying out our music within DAW’s. If there is certain FX plugins you always use, add them to appropriate channels.
If there are Software Instruments you can’t make a song without, then add channels for them – perhaps even with your most popular presets already loaded on them so you can quickly use them to write out a melody or rhythm.
We hope this proves a good aid in improving your workflow within Logic Pro.
Consider saving many different ideas for structures and layouts, you can always delete those you don’t like or end up not using.

This Article is brought to you by KAN Samples.
Pro Audio Tools for Producers.
Subscribe For Free Samples
You Will Get:
✅ 100% Royalty Free Samples For Music Production.
✅ A Free Demo Pack of our latest Product.
✅ Free Demo Packs of all Future Products.
✅ Unsubscribe any time.
✅ No junk mail.

0 comments on “How To Improve Your Workflow Using Project Templates (Logic Pro X)”